
Table of Contents
- Finding a program
- Finding the Program Brochure
- New v. Existing Programs Brochures
- Editing a Program Brochure
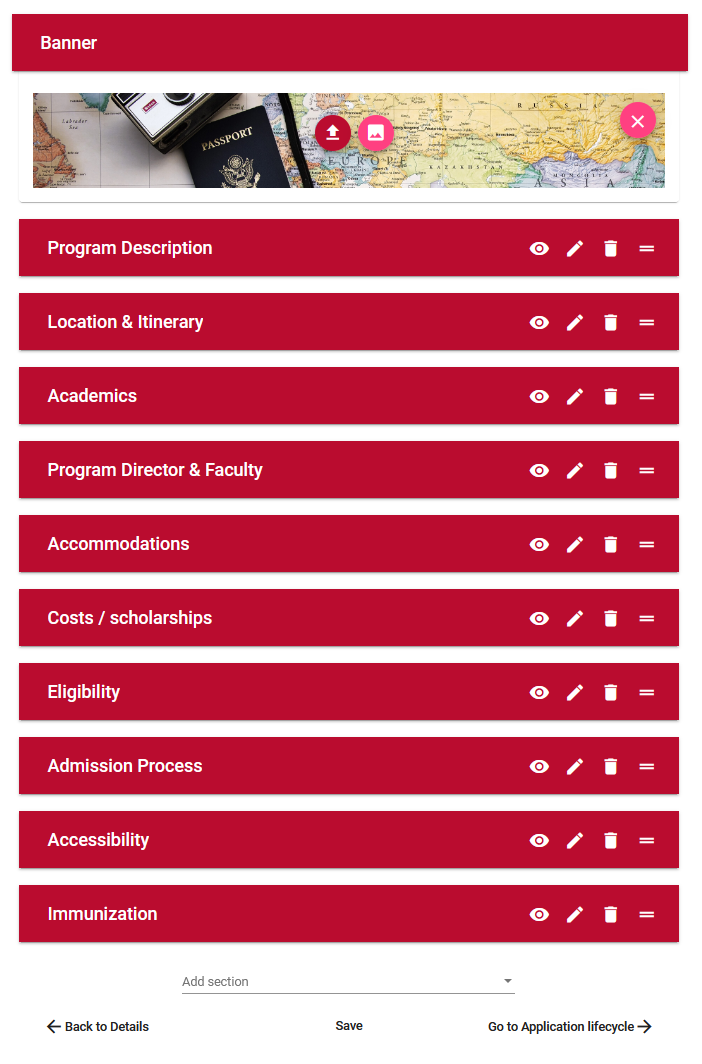
- Brochure Editor
- Banner Image
- Brochure Sections
- Editing Section Headers
- Editing Section Contents
- Related Article
Step-by-Step Guide
1. Go to the StudyAway Portal at studyaway.uga.edu
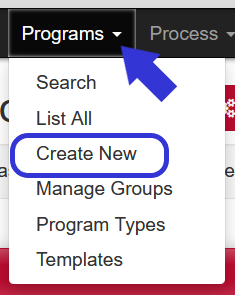
2. On the top navigation bar, click the Programs drop-down menu and select List All
3. To see the public view of a program (what students see), locate the program you want to edit and click the Sheet of Paper icon on the right hand side
![]()
4. To edit a program, locate the program you want to edit and click the Pencil icon on the right hand side
![]()
Finding the Program Brochure
2. In the program builder, click the Brochure (Program Wizard) button at the top of the page
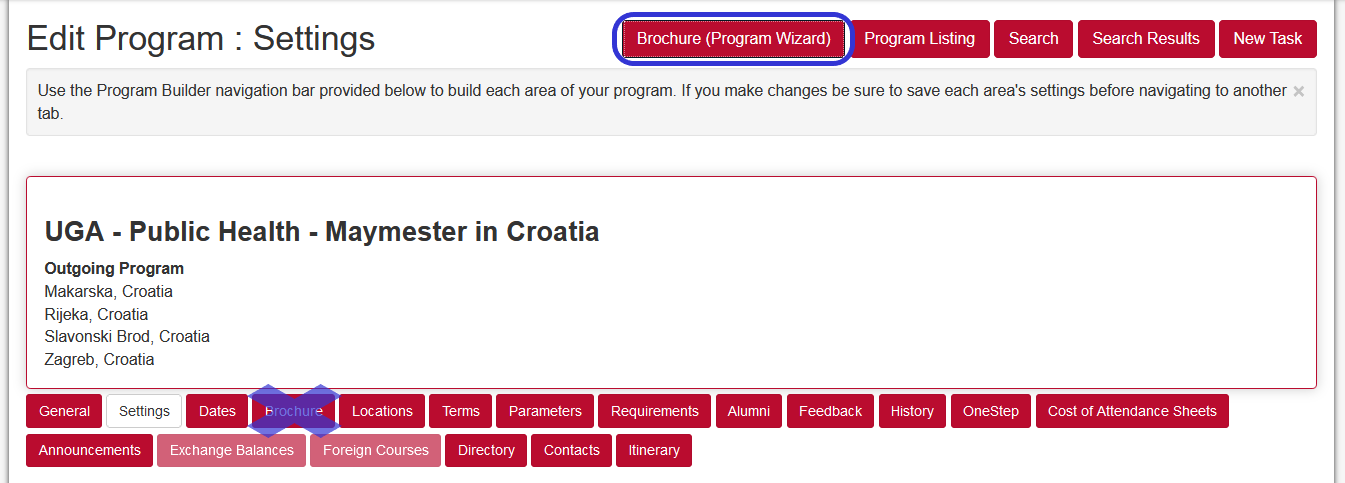
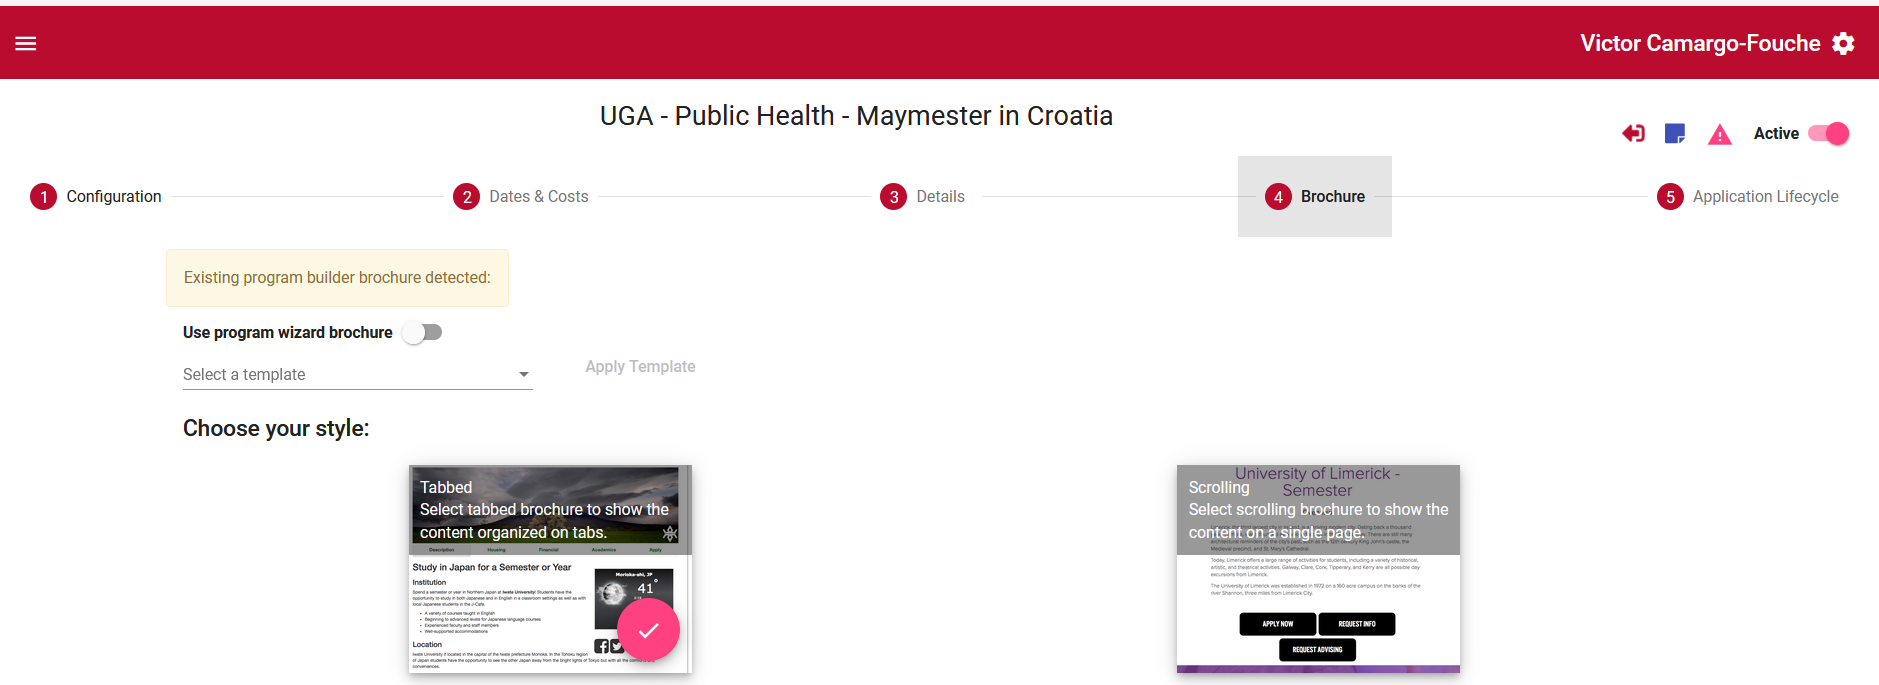
3. The page will change from the program builder to the ProgramWizard. In the program wizard, navigate to the Brochure tab (number 4)

4. This tab houses the brochure builder and editor for the program(s)
New v. Existing Programs Brochures
-
New programs:
-
Will have a pre-assigned brochure template
-
Instructions for Editing a Program Brochure can be found below
-
-
Existing programs:
-
Will need to change their current classic program brochure(s) to the new format - instructions on How to Change a Classic Program Brochure to the New Layout
-
If new brochure format is already in place, instructions for Editing a Program Brochure can be found below
-
-
An existing template should be in place based on program type
-
Templates are set to a "tabbed" layout, organizing the brochure's sections as tabs on the public page
-
The brochure editor consists of a placeholder for a Banner image, and a series of sections with content elements
-
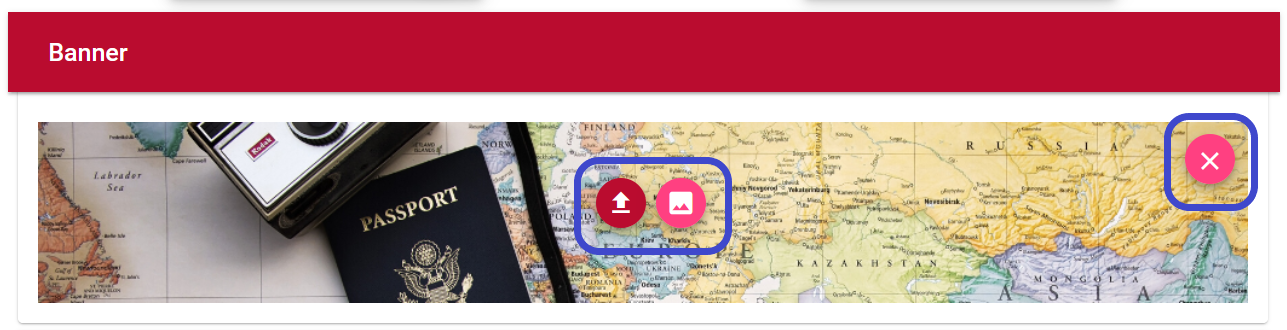
Banner images are pre-designed by the OGE. They may be changed or removed to match the program's needs if desired
-
To remove the Banner image, simply click the pink 'X' on the top right corner of the content element
-
To change the image, you can:
-
Click the red "upload icon" to upload a new image, OR
-
Click the pink "picture" icon to select an existing image already in the Portal
-
The recommended size for the Banner image is 150px H by 1000px L
-
Note: The system will allow images outside these dimensions, however, images outside these dimensions will affect the brochure formatting, including increased scrolling to reach the brochure content, making it harder for users to find the desired information.
-
Each section corresponds to a "tab" in the program brochure
-
Each section is named according to the content needed in each
-
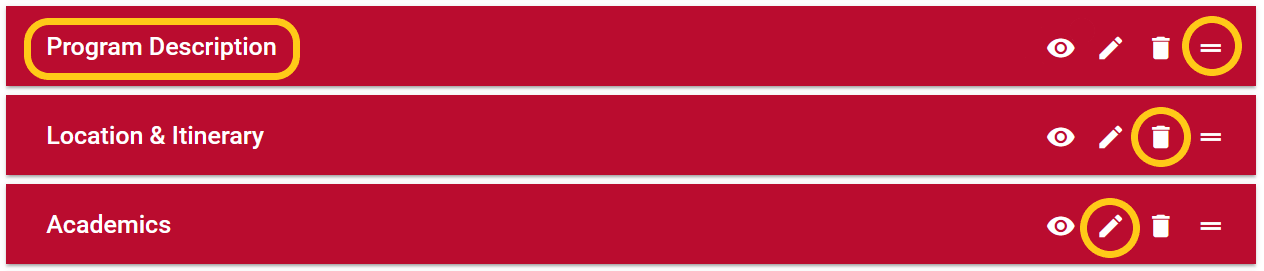
Section headers can be rearranged, renamed, and/or removed
-
To rearrange a section header, click and hold the the '=' icon and move it up or down to the desired location
-
To remove a section header, click the "trashcan" icon
-
To rename a section header, click the "pencil" icon:
-
The section name will become editable; once the name is changed, click the "check" icon to finalize
-


-
If needed, additional sections may be added to the brochure
-
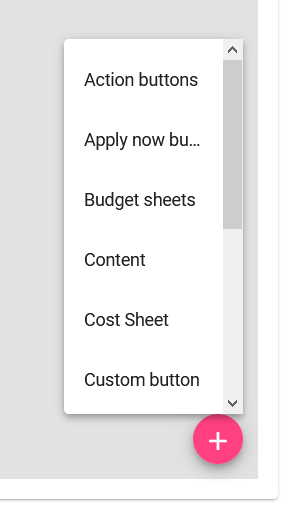
To add a new section, navigate to the bottom of the page and select Add Section. Pick one of the system generated section, or a Custom
-
DO NOT remove or make changes to the Accessibility and Immunization sections! These should be at the end of the sections list.
- Content Elements hold the information displayed on a program brochure
-
For detailed explanation of each content element, please see Content Elements Explained
1. Click the section header to display its content elements. Sections should have content elements already placed
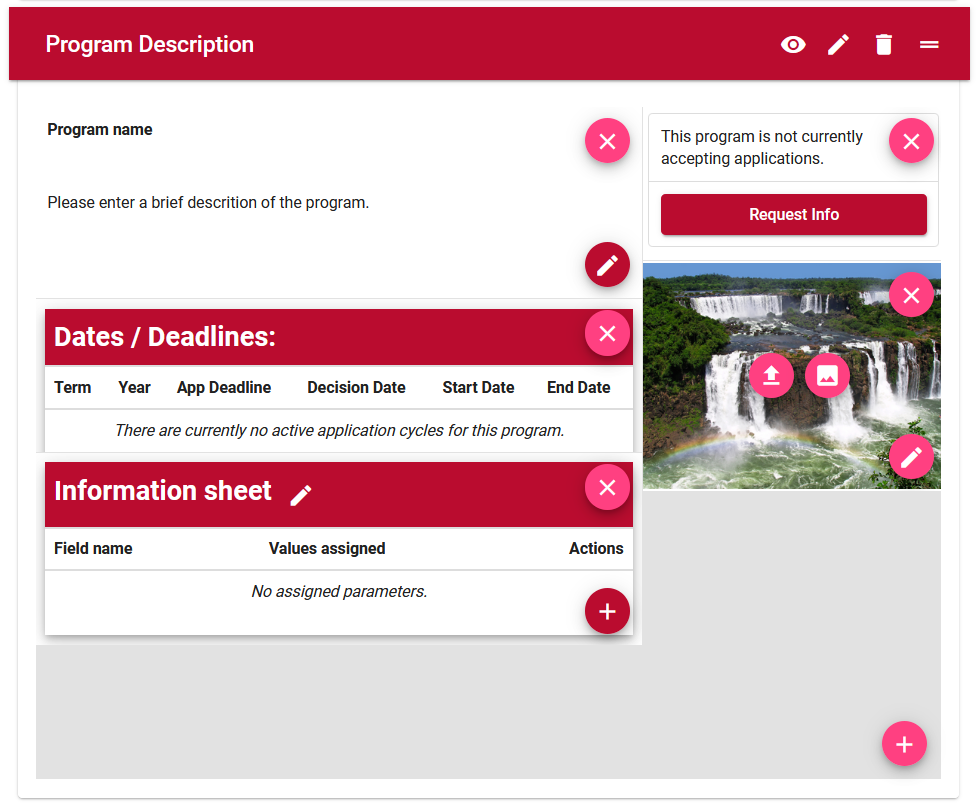
2. Content elements can be rearranged, resized, edited, and/or removed.
-
To rearrange, simply click and drag the content element
-
To resize, click one of the sides or corners of the content element
-
To edit, click the "pencil" icon on the bottom right of the content element
-
While editing, the "pencil" icon will change to a pink "check" icon. When completed, make sure to click the "check" to finalize the changes
Note: not all elements allow editing; the ones that don't will not have the pencil icon.
-
To remove, click the pink 'X' on the top right of the content element
Note: be careful when removing a content element! Once removed, changes made to that element will be deleted.
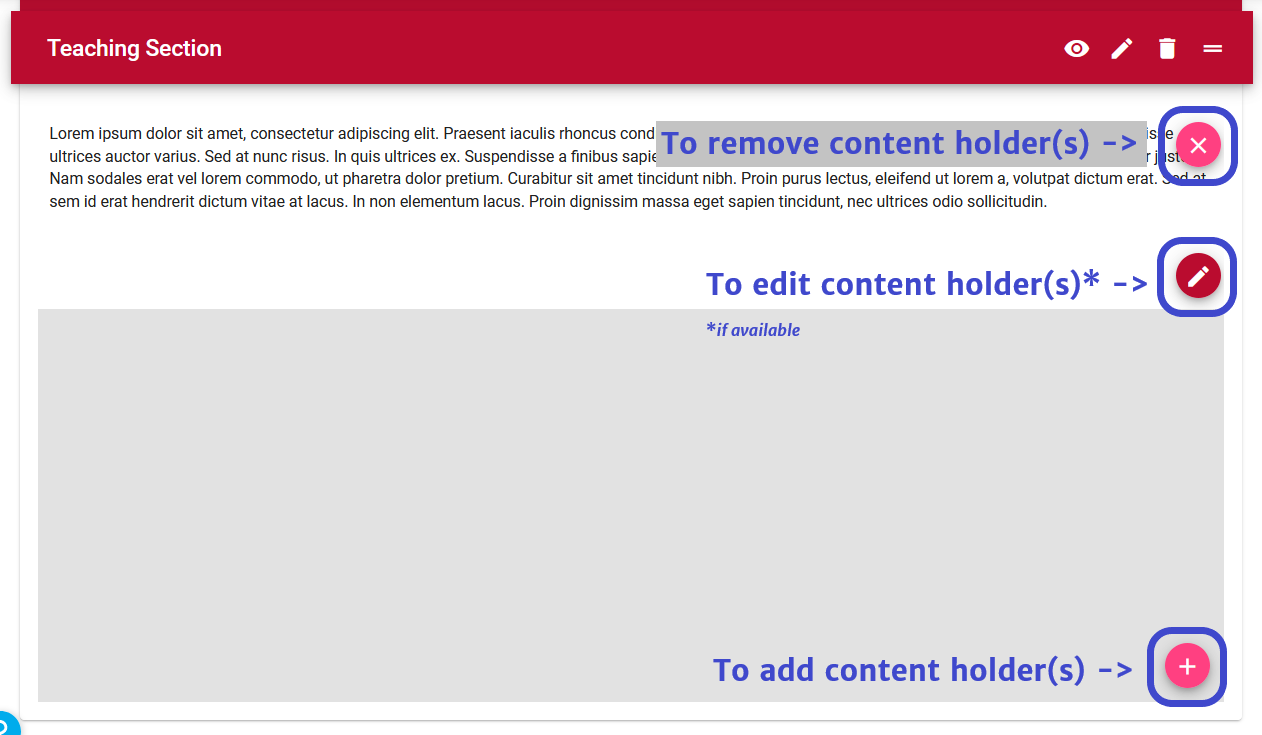
- If needed, more content elements can also be placed within a section by clicking the pink '+' icon on the bottom right of the section.
-
Content element options include:
-
Action Buttons
-
Apply now button
-
Budget sheets
-
Content
-
Custom button
-
Dates/Deadlines
-
Google Maps
-
Image
-
Information sheet
-
Video
-
-
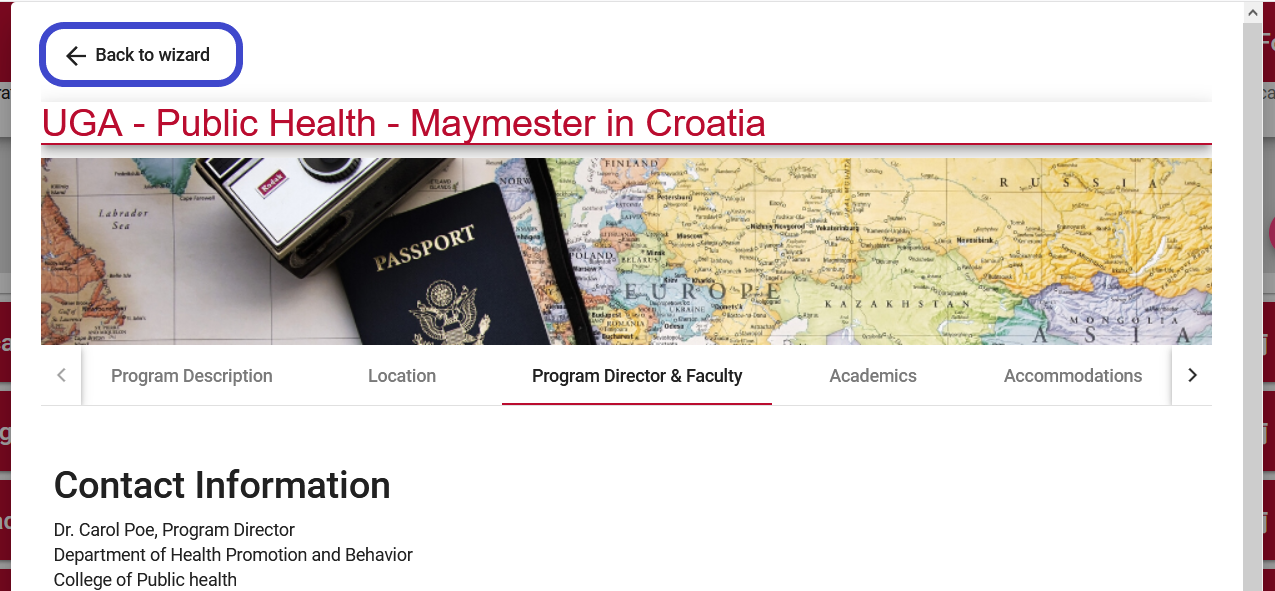
If you want to see the brochure as you progress through, click the "eye" icon in the section header

-
This will display a preview of your work, eliminating the need to move back and forth between pages to verify your progress
-
The preview window will show the current section, but it also allows you to visualize the other sections of the brochure
-
When done, click Back to wizard to continue working on your brochure
-
When you have finished making your brochure, click the Save button at the bottom of the page

When working on your brochure, save your progress often. The StudyAway Portal Team recommends saving your brochure after finishing each section.
When done editing a content element, make sure to click the pink "check" icon at the bottom right of the content element to avoid saving issues.
In case of saving errors, check that all edited content elements have been "checked" for completion. It is not uncommon to have saving errors when content elements are in "edit" mode.
If you have any questions or concerns, please contact:This email address is being protected from spambots. You need JavaScript enabled to view it.