
Overview
Programs in the StudyAway Portal can have an official program itinerary defined for a term. These program itineraries simply specify what cities students will be in, and what day they will be there. Program itineraries will be automatically deployed to all students on your program. Students may add personal travel to their own, personal itineraries. However, they cannot remove the official program itinerary from their applications. Itineraries (both program and personal) are used by UGA to locate students abroad in the event of emergency.
How to Adjust Your Program Itinerary
1. Log into the StudyAway Portal.
2. In the black navigation bar, click Programs > Search

3. Type the name of your program into the field and then click the Search button.
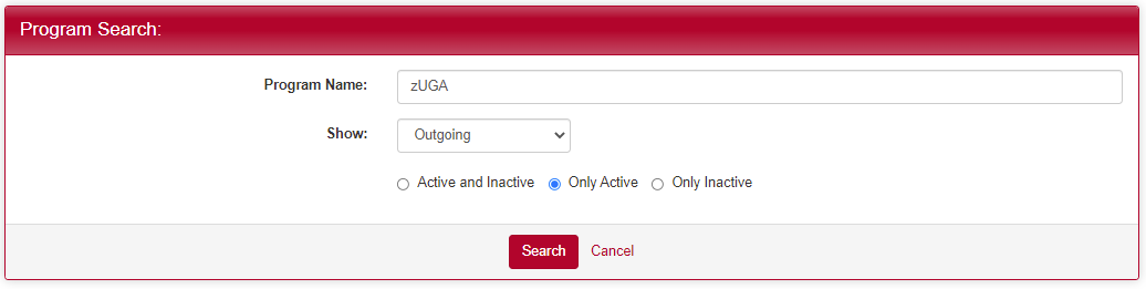
4. Click on your program's name to access the Program Builder.

5. Click on the Itinerary button.

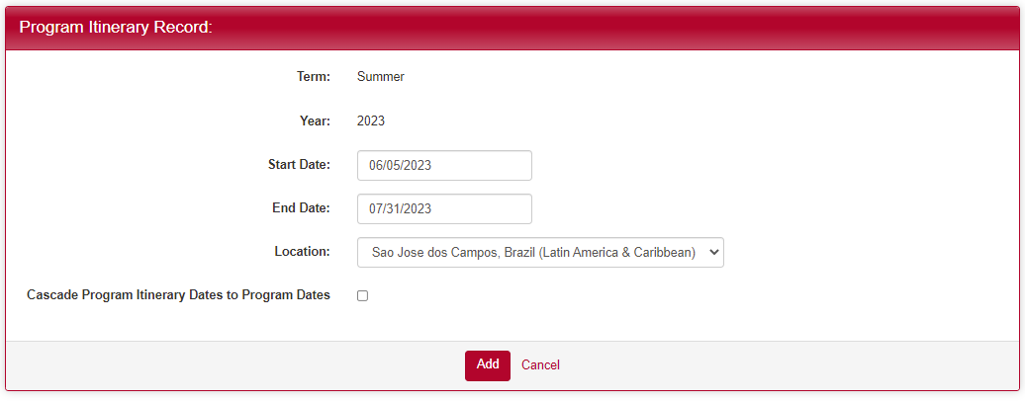
6. To add a single leg of your itinerary (referred to as an itinerary record) to an upcoming term, select the term in the "Add New Program Itinerary Record" section and click Add.
Note: If the term you want to add is not available, try clicking the "Click here to include all application cycles" link. If the term is still not available after clicking that link, make sure you have the term activated by clicking the Terms button in the program builder. If you have questions at any point, contact
This email address is being protected from spambots. You need JavaScript enabled to view it.

7. Select the start date, end date, and location for a single leg of your trip and then click the Add button. In the screenshot below, our program will be in Sao Jose dos Campos, Brazil from June 5, 2023 through July 31, 2023.
Note: If your location isn't available in the dropdown menu, you need to add it to your program by clicking on the Locations button in the Program Builder.
Tip: Generally you want to leave the Cascade Program Itinerary Dates to Program Dates box unchecked (which is the default). Checking this box will override your program's dates with the start and end dates for the itinerary record you are adding. Unless you are sure you want to change your official program dates to the start and end dates you entered on this screen, leave the box unchecked.
8. If you already have existing applicants for your program, you will be asked if you want to cascade the itinerary record your just created down to their applications. Generally, you want to cascade it to all students by checking the top box. If you do not currently have any applicants for this term, you will not see this screen.

9. You will see that the itinerary record has been added to your program itinerary for that term. To add another leg to your itinerary, repeat steps 6-8.

Deleting an Itinerary Record
1. To delete a program itinerary record, simply click the red X button for that record.
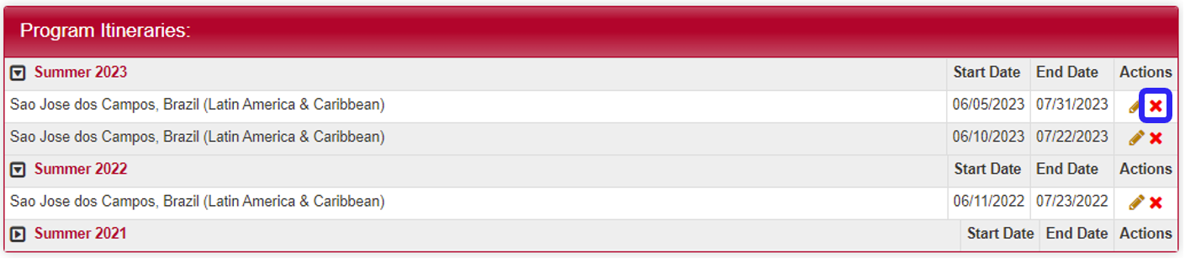
2. When you are prompted, click the OK button.

3. If you already have existing applicants for your program, you will be asked if you want to remove the program itinerary record from the existing students' applications as well. Generally, you want to cascade it to all students by checking the top box. If you do not currently have any applicants for this term, you will not see this screen.

Editing an Itinerary Record
The best method to change a leg of your program itinerary is to delete the record and then add the new one (directions above). There is a bug in the software that causes records edited with the Edit Pencil to not properly cascade down to the applicants.